
Xporter has JIRA Service Desk Customer Portal integration
Have you ever thought “wouldn’t it be great if our customers had the ability to get their reports printed on documents?”
It’s time to provide this possibility and that’s why we included this awesome feature in Xporter 5.0!
The Xporter team proudly announces the JIRA Service Desk Customer Portal integration. This integration will provide a new option on Customer Portal (ticket pages).
In this new release, we’ve worked hard to deliver this functionality that will make easier to export your templates from JIRA Service Desk.
You define which templates will be available and what information will be printed as made with normal Xporter Templates.
How to perform? Just follow these steps to set up and use Xporter for JIRA Service Desk
1) Configuring Global Settings
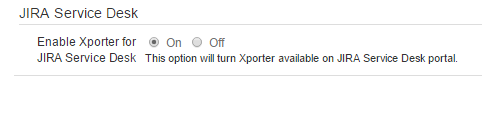
First, you must enable Xporter for JIRA Service Desk. This is mandatory, otherwise the action won’t be available on JIRA Service Desk Customer Portal.
On Global Settings (Xporter for JIRA administration), turn the option Enable Xporter for JIRA Service Desk to ON and then click Save.
2) Adding template with JIRA Service Desk scope
The templates scopes is also a new feature of this release and is a huge advantage for our customers. For further information on Template Scopes, please this post.
With template scopes you can manage where your Xporter Templates can be used. In this case, it’s important to certify that the user have at least one template with JIRA Service Desk scope associated in order to export the document in JIRA Service Desk Customer Portal.

In the image above, there’s a template with the scope JIRA Service Desk. This template it will be available in Customer portal view, and you can have more than one template with each scope. If you have more than one template defined to be shown on Customer Portal, the user will be able to choose from them.
You can use this feature with or without permission schemes. If the Xporter is enabled for all projects and all users and the JIRA Service Desk feature is enabled, then all JIRA Service Desk Portal project will have the Export feature available.
However, it’s really common to need to set some rules on who can export what. The correct approach to apply this kind of restrictions is by setting up a permission scheme.
3) Permissions
Permission schemes allow administrators to define which Projects, Issue Types, User Roles and Groups will be available to use Xporter. Also allows to manage templates available on each of those Issue Types.
You can define who is able to use this feature, which Issue Type (in this case, Request Types), and which templates will be available by Issue Type. This is brilliant! Let’s see what do we need to setup a new one.
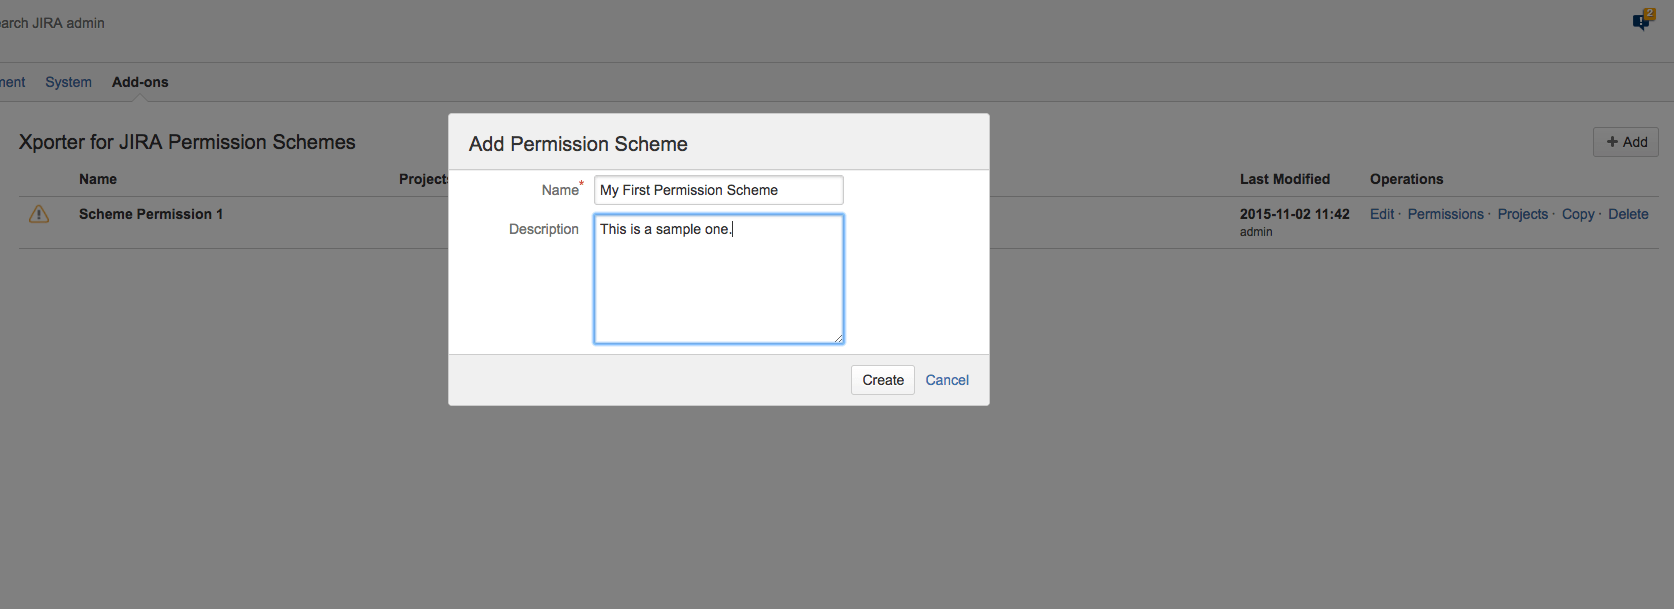
Go to the Permission Schemes page (Xporter for JIRA administration) and create a new one by giving it a name and a description:
When created, assign the project which reflects your Customer Portal. To set the permissions, click on Permissions action like below:

On the permissions screen you can define, as described above:
- Who’s able to export using Xporter. This can be made by selecting:
- User Roles, or
- User Groups
- Request/Issue Types
- Templates by Issue Type
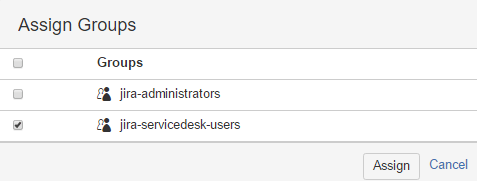
Who will be able to export?
- Click on Assign Roles and choose the radio button Service Desk Customers
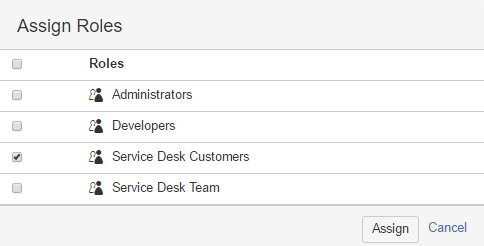
- Click on Assign Groups and choose the radio button jira-servicedesk-users
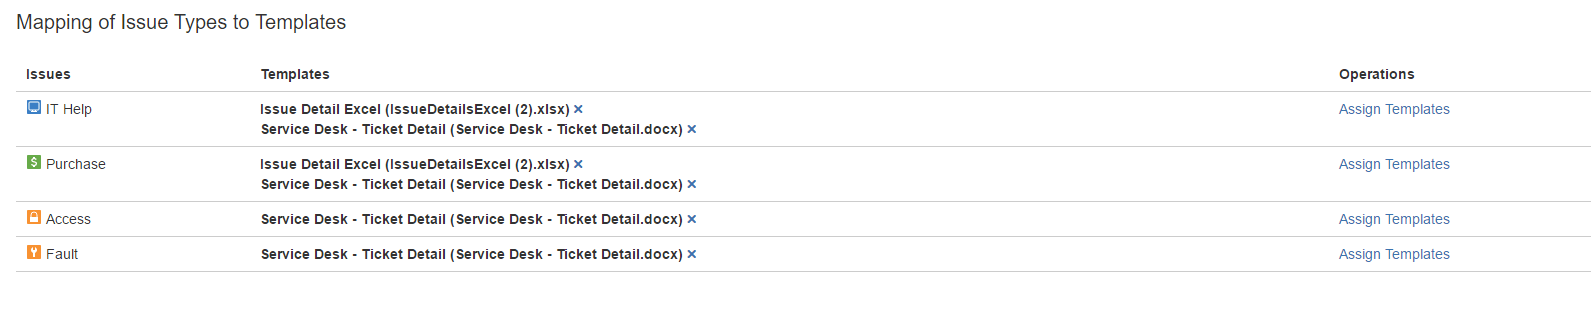
What kind of Requests will be available to export?
- Click on Assign on Issue Types allowed to be exported and add your Customer Portal issue types.
- Assign templates to each issue type
After this, one step is missing: to assign the permission scheme to your Service Desk project. You just need to go back to permission schemes screen and click on Projects action from the new permission scheme and tick your project.
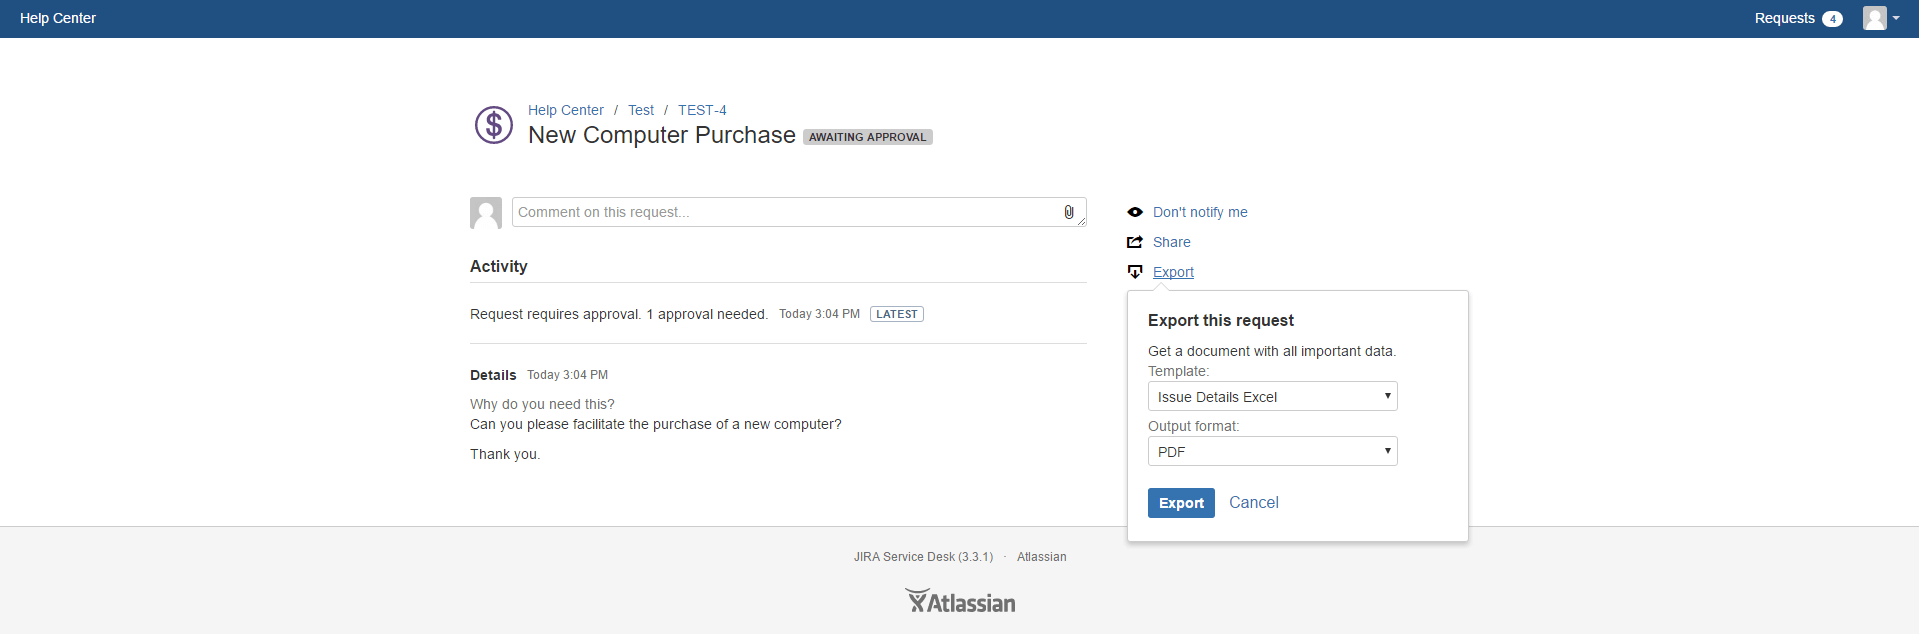
4) Customer Portal
When the user accesses the customer portal of a particular request, he will see a new action called Export. When clicked, a new inline dialog is shown to select which template/output format will be used on document generation.
Thank you for your time reading this post and being part of our great Xpand Addons family!
Now it’s time to turn the feature on and give to your customers the ability of getting their tickets printed on documents. If you want to check Xporter for JIRA documentation, head over here.
Enjoy our product!


